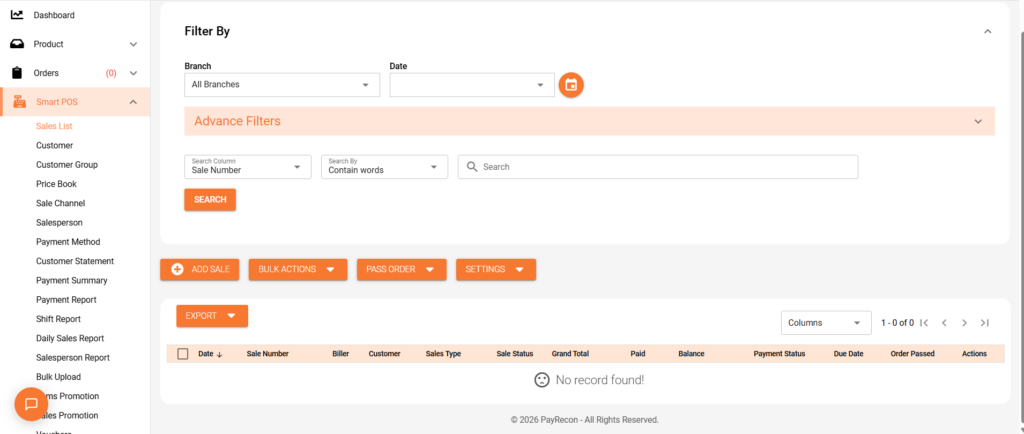
In the navigation bar on the left side of the page, navigate to ‘Smart POS’. Under ‘Smart POS’ click ‘Sales List’.
Under ‘Sales List’ Page, click ‘Add Sale’.
Step 2: Add Sales
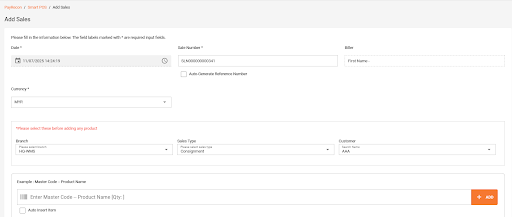
An ‘Add Sales’ page will pop out. On the ‘Sales Type’ field, tap on the dropdown list and choose ‘Consignment’. Then, fill in all the other relevant information to complete the sales order. After finish entering all the relevant information, click ‘Confirm’ to save the sales order
Step 3:
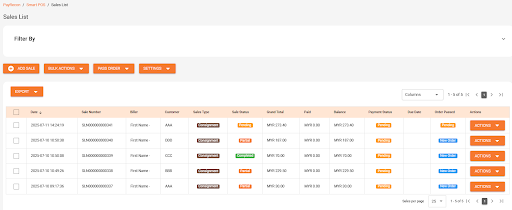
A Sales Order should be created with the status displayed as ‘Pending’ in the the sales list page
Step 4: Pass Sales Order to Consignment
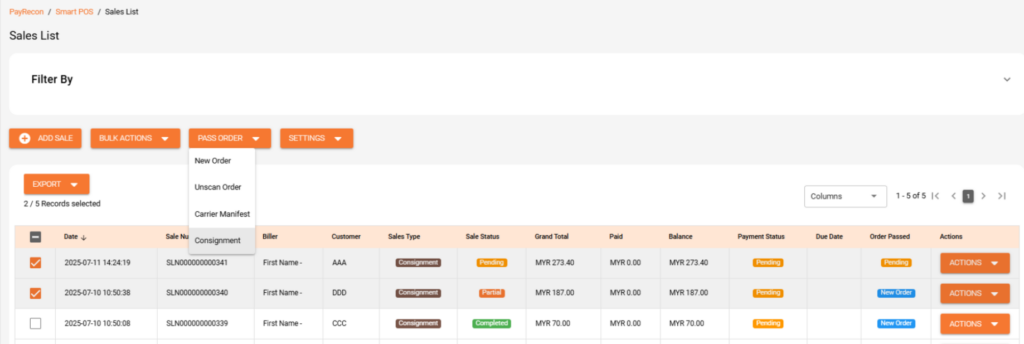
Sales Order can only be passed to consignment if its status is either ‘Pending’ or ‘Partial’.
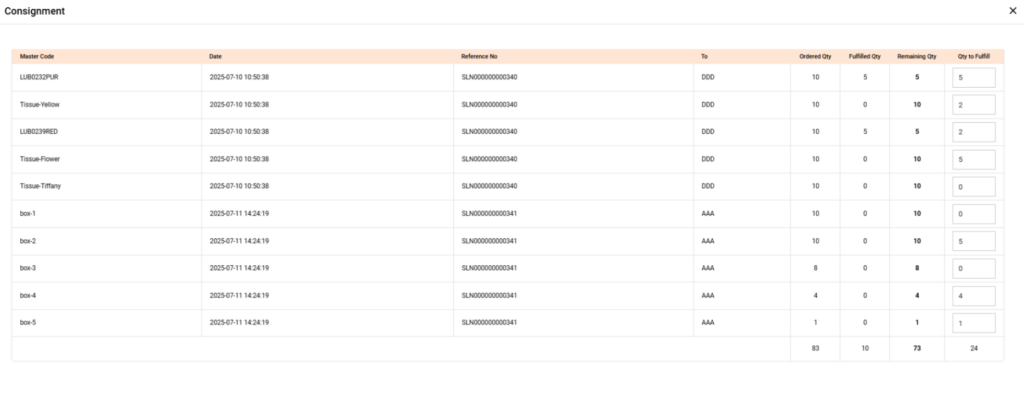
In the Sales List Page, select the Sales Order that you would like to pass and click on ‘Pass Order’ and choose ‘Consignment’. Insert the quantity of the item that is able to fulfill. Click ‘Pass Consignment’ to proceed.
Step 5: Proceed to Consignment
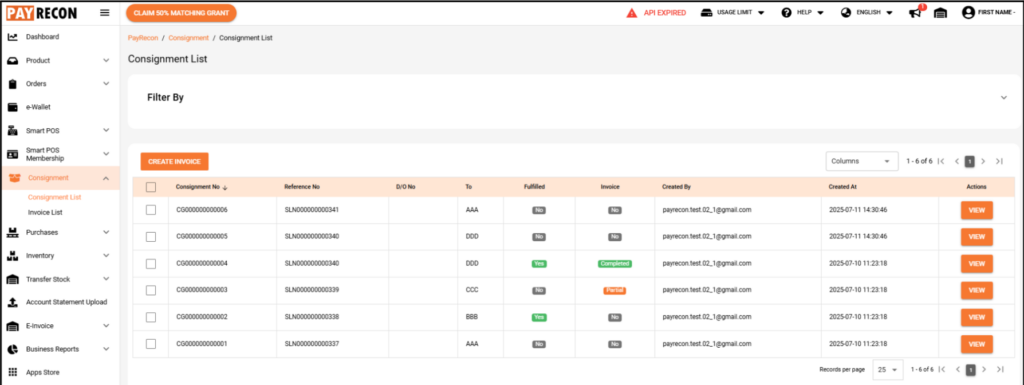
In the Navigation Bar on the left, look for ‘Consignment’. Under ‘Consignment’, click ‘Consignment List’.
In the Consignment List page, you will see the consignment note created in the list. The consignment note will auto pass the order to New Order for shipping arrangement.
Step 6: Proceed to Orders Module
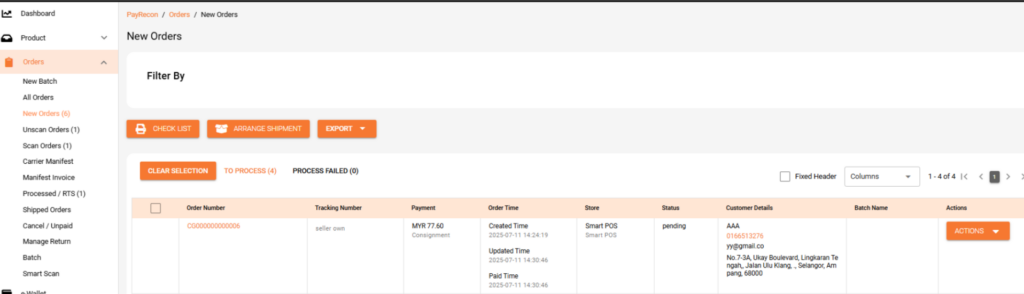
In the Navigation Bar on the left, look for ‘Orders’. Under ‘Orders’, click ‘New Orders’.
In the ‘New Orders’ page, The consignment order will be in the list and may be arranged for shipment.
Step 7:
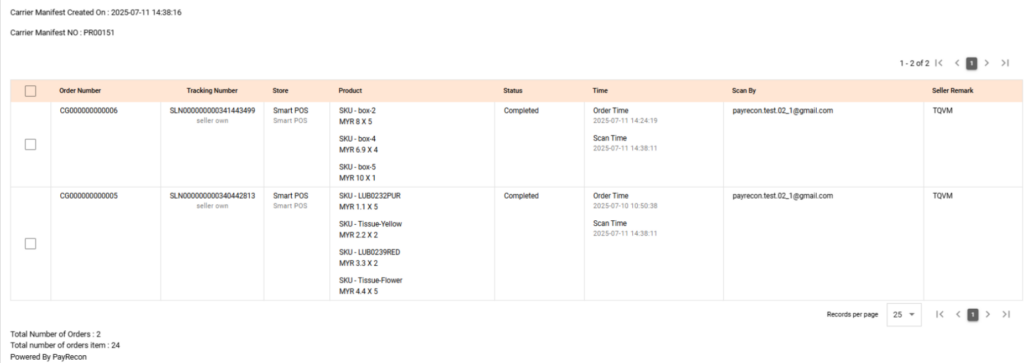
You may now proceed with the consignment orders with usual steps as in the Order Management System (OMS) and Warehouse Management System (WMS). In the end, manifest the consignment orders.
*NOTE : Consignment orders are NOT allowed to be passed to accounting as invoices.
Step 8:
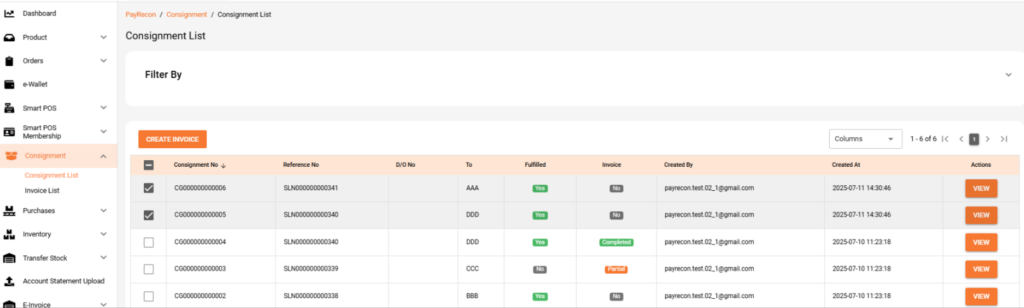
In order to crate an invoice for consignment order, proceed with the Consignment module. In the navigation bar on the left side of the page, navigate to ‘Consignment’ and click ‘Consignment List’.
On the ‘Consignment List’ page, select the consignment that you would like to create an invoice for, then click ‘Create Invoice’.
Step 9:
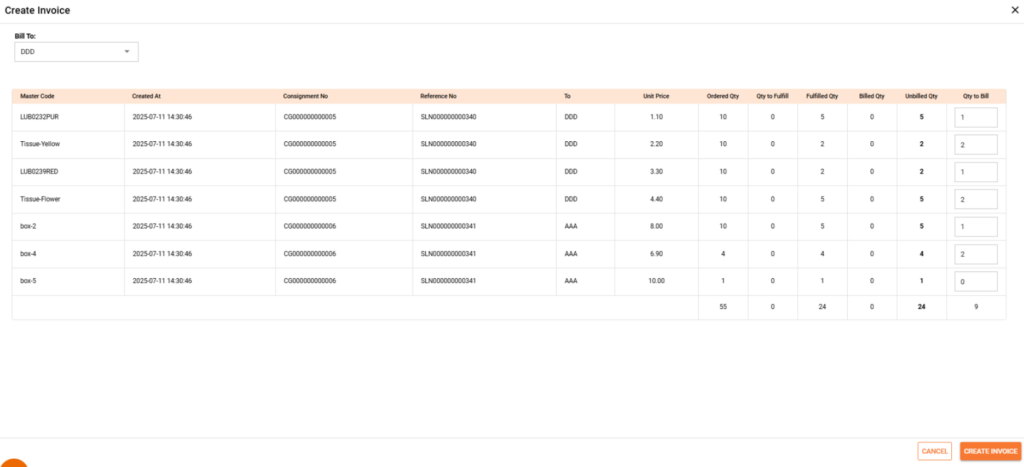
You may select the Biller for this invoice, insert the quantity of each item that you would like to include in the invoice and click ‘Create Invoice’
Step 10:
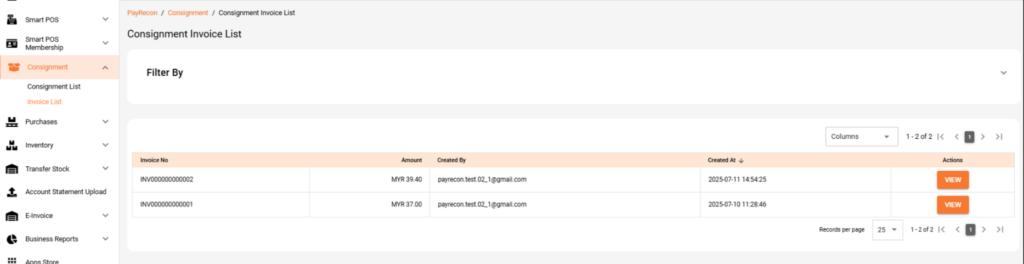
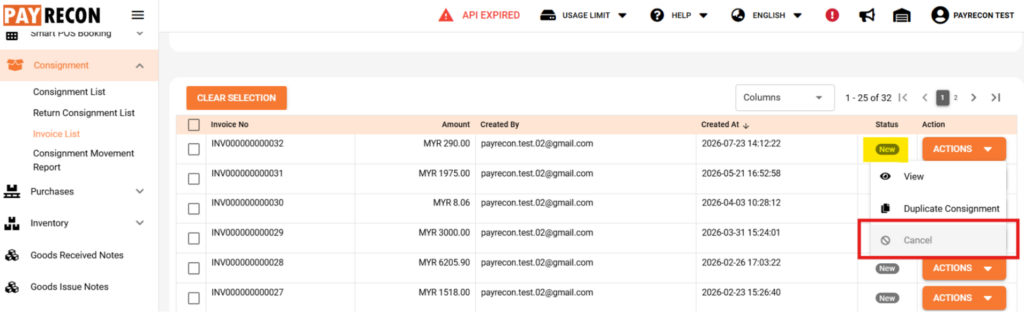
Proceed to Consignment Module, click on ‘Invoice List’ to view all the invoices.
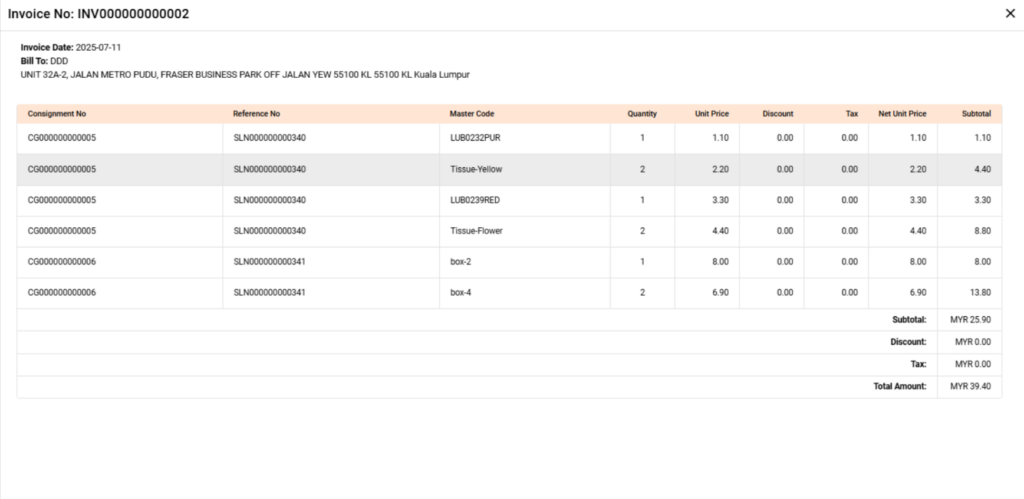
Click on the invoice to view the invoice details.
Step 11:
Additionally you may also cancel the invoice and recreate a new invoice.
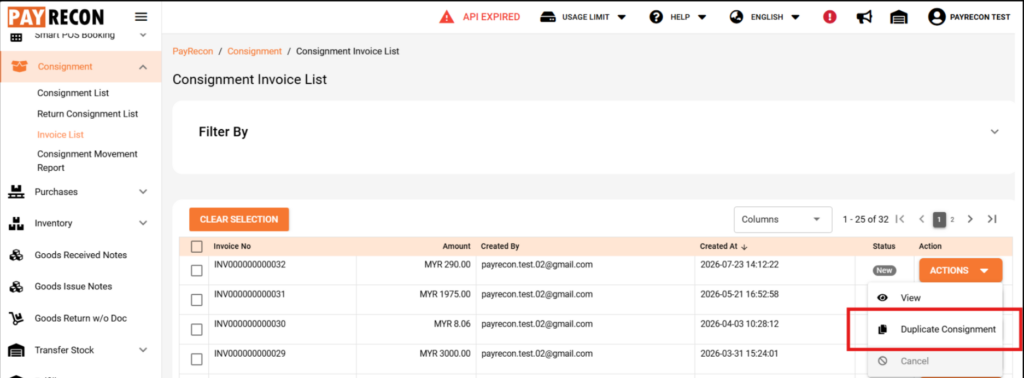
If you would like to re-consign the same item in the invoice, you may also duplicate the consignment.
Step 12:
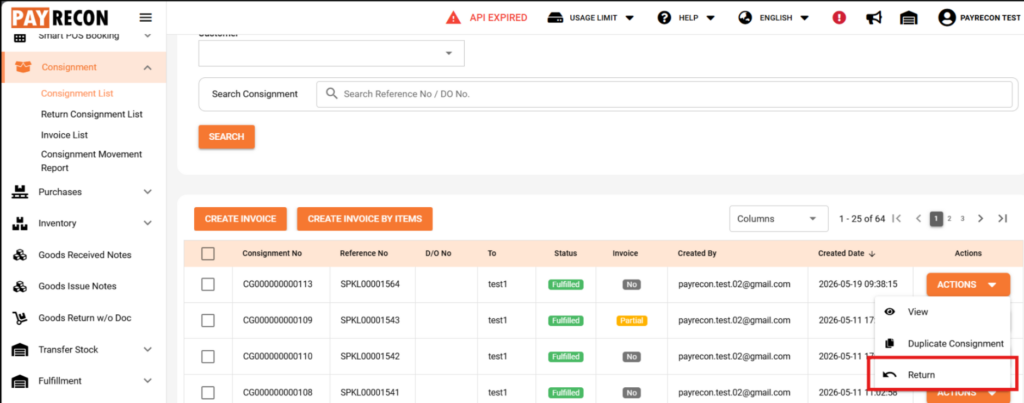
(Optional) you may return the Consignment that has been fulfilled.
Step 13: Return Consignment List
In the navigation bar on the left side of the page under ‘Consignment’, click ‘Return Consignment List’.
In the ‘Return Consignment List’ page, all
The consignment that has been set to return will show in this list. When the status is pending, it means that the consignment is yet to process in Manage Return (in OMS) or in Stock Return (in WMS). After completing the return process, status will be updated to Returned.
You may also cancel the return consignment while the status is Pending.
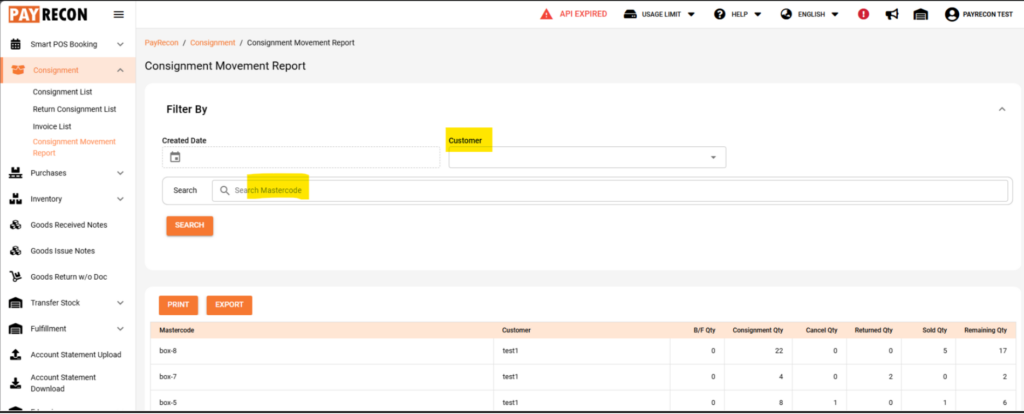
Step 14: Consignment Movement Report
In the navigation bar on the left side of the page under ‘Consignment’, click ‘Consignment Movement Report’.
In the ‘Consignment Movement Report’ page, all the consignment movement history will be displayed here.
You may view and export the report by filtering based on individual customers or certain item mastercode.